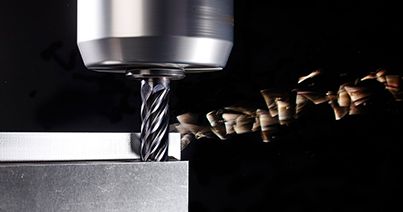
Mastering Precision: The Anatomy of a Toolholder System 

Toolholding systems are an essential component of any metalworking operation. When precision and efficiency are paramount, the toolholding system plays a pivotal role in securing drills, end mills, taps, and reamers in place during your machining operations. Here, we will explore the anatomy of a toolholding system and provide some tips on how to use them effectively.

Anatomy of a Toolholder

A robust toolholder system enhances productivity, reduces tool wear, and ultimately produces superior-quality workpieces. Here’s what makes up a toolholder system.

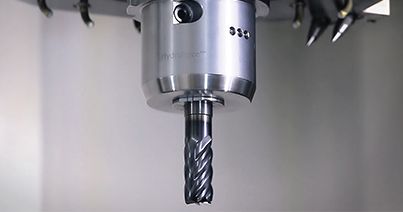
  • Shank: The shank is the base of the toolholder and is designed to fit into an adapter or directly into the machine spindle. It provides a connection between the machine and the toolholder system, transmitting power and rotational motion. It can be cylindrical or have a specific shape, depending on the type of machine and holder being used. 
  • Collet or Chuck: The collet or chuck grasps and holds the cutting tool. It can be tightened or released using a variety of ways such as drawbars, hydraulic pressure, or manual operation. They both provide excellent gripping force and versatility by being able to hold a wide range of tool shapes and sizes.
  • Flange/Taper: The flange attaches the toolholder to the spindle and ensures a secure and rigid connection, minimizing vibrations and improving machining stability. Additionally, the flange may have holes or other features for mounting to the machine tool. The taper extends from the flange downwards and serves as the interface ensuring precise alignment between the toolholder and the cutting tool. Common taper designs include the CAT or CV taper,DV, HSK, KM, Morse taper, British Taper (BT) taper,VDI Tooholders, and R8

Overall, the toolholder body is the main section of the tool holder and typically includes features such as the collet or chuck, the taper, and the flange. It may also include other features such as coolant channels, balancing cuts, or vibration-damping mechanisms.

Quick Change Ability

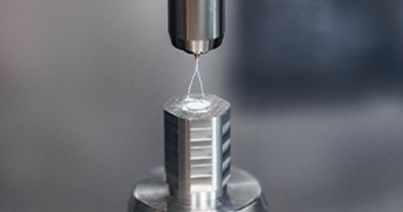
One of the most noteworthy advancements in toolholder systems is the quick-change systems. It incorporates a combination of innovative designs such as automatic tool release, presetting, and repeatable positioning. 

The quick-change system allows operators to rapidly swap tools without sacrificing accuracy. It also allows for increased flexibility in machining operations, reducing changeover time, and increasing productivity. For example: The KM™ quick-change tooling system is a cost-effective choice for static (lathe) and dynamic rotating operations.

Tips and Tricks for Using a Toolholder

Now that we've covered the anatomy of a toolholding system, let's take a closer look at how to use them effectively.

  • Compatibility with Machine and Tooling: There are many different types of toolholders available and each is designed for specific applications and cutting tools. So, make sure your holders are compatible with your specific machining center or machine spindle. For specific toolholder selection consider factors such as the material being machined, the cutting parameters, cutting forces, and accuracy requirements. Using the wrong tool holder can result in poor performance, tool breakage, and damage to the workpiece.
  • Tool Clamping: Different systems employ various clamping methods such as collets, hydraulic chucks, shrink fit, or hydraulic expansion. Methods of clamping may involve using a torque wrench or other tool to apply the appropriate amount of force to the collet or chuck nut. Assess factors like gripping force, runout, repeatability, and ease of tool changes. Additionally, you should avoid over-tightening, which can damage the collet or chuck and you should avoid under-tightening, which can result in tool slip or a shift during machining.
  • Rigidity and Stability: Find a system that minimizes vibrations and chatter during machining operations. Consider toolholders with features like reinforced construction, anti-rotation mechanisms, and vibration-dampening capabilities. Additionally, use the shortest gage line available.
  • Proper Install: Make sure the toolholder is securely held in place and that the cutting tool is accurately positioned. It is important to properly install the toolholder into the machine tool spindle. This may involve using a drawbar or other mechanism to tighten the toolholder and ensure that it is seated properly in the spindle.
  • General Maintenance: Although this may be considered obvious, cleaning the holders and adapters are something that can be easily overlooked. By ensuring your equipment is properly maintained, your toolholder systems will last longer and reduce any kind of damage.

Precision machining and minimizing runout are also critical for achieving success in your operations.  Excessive runout can lead to poor surface finishes, decreased tool life, and compromised dimensional accuracy. Consider toolholding systems that feature low runout specifications and have minimal deviation between the tool axis and the machining path.

By keeping these tips in mind, you’ll have a toolholding system that will enhance precision, stability, and productivity, ultimately elevating the quality of your metal components.

Summary

Toolholding systems are a crucial component of any metalworking operation. By understanding the anatomy of a tool holding system and how to use them effectively, metalworkers can achieve high-quality results while minimizing the risk of tool breakage or damage to the workpiece.

Kennametal provides several toolholding systems. Contact an expert for additional information on our high-performance products.

You are about to add to your My Solutions page. Do you want to proceed?
Select the destination where you want to move to.
New Folder
    • Applied Filters:
    • Clear All

product-image
Please adjust the following properties from

ISO Catalog Number

ANSI Catalog Number

to find similar products.

The following files are available

Please select a file to download

Models

You should be logged to see your dashboard information
Session expired due to inactivity, please login again
The product/s () you were trying to add to the cart is/are not available, please contact customer service
item(s) successfully added to the cart
View Cart

. Please enter the desired qty for the material(s) you want to include in your promotion or Proceed Without Promotion and only your base materials will be added to the cart.

Minimum quantity should be

SAP Material Number ISO Catalog Number Grade  

You are about to leave the Solution building process.

Are you sure you want to leave?

Standard

ALL

Material

Select a Value

Hardness

--

Hardness Scale

--

Permitted Groups :

Group

SubGroup

Hardness (HB)

Hardness (HRC)